Now blogging at THIS SIMPLE HOME.

Now blogging at THIS SIMPLE HOME.

At This Simple Home

Showing posts with label preschool craft. Show all posts

Wednesday, November 30, 2011

Christmas Craft Ideas

Over the past two years we have made a handful of Christmas crafts together.  I hope to do more this year, too.  

Gingerbread Children
(Yes, the 2010 gingerbread kids are still hanging!)


What Christmas crafts do you think we should do this year??

Thursday, October 6, 2011

Fall Tree Craft

This idea has been showing up all over!  I first saw it here, though.   I love when an idea can be guided a bit for a young child, and yet it still allows their own creativity.  We made our own autumn tree-despite the green leaves hanging on around here.

This was also an easy project to complete with two children (nearly 3 and nearly 5) at the same time.  Sometimes I don't pick the best projects for two children.


First, I traced each of the children's hands with a brown crayon.  Then the children colored their "tree trunk."  I chose to use crayon for the less-messy factor for my son's sake my own sanity.  However, if I were to do this again, I think markers or paint would be better.  You could even paint the child's palm and arm and "print" it to make the tree.
 After coloring was complete, the children were given one color at a time.  We used the colors yellow, red, and green.  My children no longer need to be encouraged to say words, but I still modeled for my son "Dot, dot, dot" with each fingerprint to the paper.  He said dot with each fingerprint, too!  This may be especially helpful for young children when they may want to use their fingers to smear the paint instead of making dots.  However, it IS their project!
 The paint palette (for less than $1 at Walmart) was perfect for this.  I also gave each child a napkin to clean their fingers in between colors.  My daughter quickly remembered that she could mix red and yellow to create orange.  Her colors/dots were spaced enough that it didn't happen "naturally."
 You can see below my daughter chose to add grass to her picture.  My son's picture may be after a windstorm, but it's still HIS fall tree project!
Mounting these on colored construction paper prior to display adds a very nice touch and makes the children feel extra-proud.

Our big fall book that we've enjoyed from the library recently is Poppleton in the Fall.  We just love Poppleton!

Next, I think we'll be making a fall wreath since M asked to replace our summer wreath craft (that I never posted about).  We'll use our coffee filter technique, I think...they love that!

Monday, June 27, 2011

Treasure Box

It seems that most young children are naturally collectors.  My daughter is no different.  

When we were reading an issue of a High Five (Highlights, but for younger children...we definitely like it), M was excited to see the craft idea of making a treasure box.
She really enjoyed the process.  M is four years old, and it was definitely a one-on-one project since she needed help alternating the craft sticks.  (Thankfully E was not overly interested.)
I definitely recommend creating a treasure box with your little collector!
We decorated with a simple "M" and a sticker jewel on the top.  A foam sticker cross decorates the interior of the lid.  

M was very proud, and she still loves her homemade treasure box.

Monday, May 23, 2011

Homemade Stamp

A while back, we had a 55th birthday to celebrate in the family.  We made a homemade card to give.  We made a stamp, and used handprints to make the card.
To make a stamp for the number five, first draw a block-style 5 on paper. Then turn it backwards and trace it on sticky foam. After cutting it and removing the backing paper, I placed it on a wooden block. I made a stamp pad from a folded paper towel and paint. Then I had my child stamp away on the inside of the card! It wasn't until hours later that I realized that there are eleven fives...fifty-five!
I thought two five-fingered hands would be a nice representation of 55 as well, so I painted hands and attempted hand prints for the front of the card.

Homemade stamps are easy and fun!  Give them a try for yourself!


Thursday, May 5, 2011

Mother's Day Flowers and Butterflies

Spoiler Alert: If you are a grandmother to our kids, you will want to skip this post.  

I just love hand print and fingerprint crafts.  Today I have a hand print butterfly and fingerprint flowers to share with you that could both be used for a preschool or school-aged Mother's Day craft.

For the fingerprint flowers, I simply cut some white cardstock into smaller pieces (approximately 4x5).  My four year old practiced on paper first, but really wanted to complete her flowers independently, which means no or little guidance from this mom.  Her flower is pink.  My 2 year old son's is blue.  He thought this project was great fun and allowed me to help him.  Of course, afterwards, both children painted with paintbrushes.  After the paint was dry, I added grass and stems and a personal message on the back.
 To make hand print butterflies, you could actually use two children's hands, but in this example, only my daughter wanted to participate.

We traced M's hands.  While I cut them  out, I had her cut out two "bodies" for the butterfly.  We arranged the hands between the two bodies.  Then she drew a face on it.
 

Ours is displayed in our window by the front door.  With it being two sided, it makes a great window display, even if the colors fade quickly.
I can't believe it's nearly Mother's Day.  It's just a few days away since it is "early" this year. 

Wednesday, April 27, 2011

Coffee Filter Flowers and Easter Wreath

When spring was officially here, I had to remove our coffee filter snowflakes from our French doors in the kitchen.  They really had been so pleasant to see, that I knew I wanted to do something fun for spring.

It didn't take long for me to think about how flowers could be made in the same fashion as the snowflakes. I wanted to make a little scene full of flowers, but as it turns out, the children weren't so interested in the process.  They did sweeten our view though.
 M knew she wanted to add stems and leaves.  She made the grass herself after I got her started.
 We used small coffee filters.  We colored with markers, and then spritzed with water, just like with the snowflakes.  After they dried, I folded them and cut them into varied flower shapes.  Consider skinny or fat petals and rounded or pointed petals.  

(The Frugal Family Fun Blog did something similar with water colors.  You might like to see that, too.) 

Since no one is looking to make an Easter wreath at this point, I'm just adding this project to this spring post.  We also made an Easter wreath when M asked to decorate before the family came to visit for Easter weekend.  (I don't decorate seasonally.  I just don't.)  I know a blog I love inspired this, but I'm not sure which one.  (If you know, please leave me a comment!)  The children colored and decorated eggs with markers and stickers.  I also wrote on a few.  I loved it when I drew a cross, and M wanted me to write, "My Jesus is alive!"  The "I ♥ Jesus" was also her idea.  So sweet!  I'm thankful that my daughter knows the reason we celebrate Easter.

I cut the center out of a paper plate to prepare the wreath.  After cutting lots of egg shapes, I let the kids decorate.  When they were completed, we glued them to the plate.  Voila!

Wednesday, March 23, 2011

Caterpillar Name Craft

This is a Rainbow-Caterpillar-Name-Craft.  And I love it!  I really like to do a lot with children's names so they can recognize their names, and eventually spell and write their names at an early age.  We have given personalized name pillows and personalized wall hangings as gifts.  We made the name snowmen this past winter.  Last week I needed to think about removing the lovely name snowmen from our front door.  I knew it would devastate a certain four year old unless we had something to replace them.

I looked around online but didn't really find much for name crafts, let alone a spring name craft.  Using the circle idea from the name snowman, I came up with this little caterpillar name craft.  Being spring, I thought it was time to talk to my daughter about the colors of the rainbow, too.

I used scrapbooking paper for the background, though a solid color may look nicer.  I used a biscuit cutter to trace the circles.  (I cut the circles pictured, but had my 4 year old cut most of hers herself.)  After cutting, we arranged in ROY G. BIV order, and glued them to the paper.  We made a face and added a pipe cleaner antenna.  Then we used some of our foam letters to add some extra color to the caterpillar, though this would be great name-writing practice, too!  (Obviously, I took this photo before we actually put the stickers on the caterpillar.)

This craft goes great with The Very Hungry Caterpillar and My Promise Rainbow. Very Hungry CaterpillarMy Promise Rainbow: And the Story of Noah's Ark (Baby Blessings)
What other books would you recommend for rainbows and caterpillars??  
You may also be interested in this simple rainbow craft or this rainbow dessert.
I'm linking up today at
Shibley Smiles


abc button

Monday, March 21, 2011

Spring and Easter Crafts and Activities for Preschoolers

Happy spring!!  We have a few spring crafts from the past that I thought I would share with you now that I have all of our snow crafts shared!

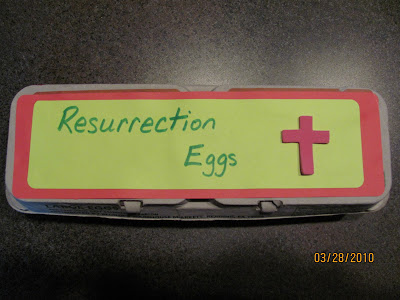
We love the Resurrection Eggs that we made!  Included is also a printable for you!  (Also available for purchase, but we enjoyed making them.)  Last year M was 3 and was able to use the eggs to tell the story of Jesus death and resurrection.
[IMG_0577.JPG]
A simple preschool rainbow craft, or you can take it a step further by including God's promises on each strip like discussed here.  In fact, we may do this activity again this year and include God's promises.  (We didn't previously when M was three years old.)  I was also thinking this could be turned into a name craft.
Colored pasta necklaces would be great gift for Mother's Day!
[100_2571.JPG]
Button eggs are fun!  For a younger child you may want to leave off the ric rac stripes.

Wednesday, March 16, 2011

Freight Train Craft

Both of my children love the book Freight Train, by Donald Crews.  With its simple language and bold pictures, it's a keeper.

Freight Train Big Book (Mulberry Big Book)  Now that my daughter, age 4, can draw some basic shapes, I thought it would be great for her to draw her own freight train, based on the book, and have her color it.  Since my son likes to color, I thought I could draw the train, and have him color it.

We began by reading the book, one page at a time, and drawing the car that was there.  I modeled it for M.  First we drew the train track.  Then we drew a red rectangle at the back and colored it.  We continued until her freight train was complete.  Her coloring skills hide her nice shapes, but she was very proud.  If you look closely, you can see the wheels and how the cars are connected.

As it turns out, E was not interested in coloring the train.  He just colored for fun while we worked.  I think last year's Freight Train craft would be much more his style.  Just a simple paper craft!  (Click to see it!)

We are linking up to a couple of great sources!  Check them out!
abc button

Shibley Smiles

Monday, March 14, 2011

Painted Snowman

On one of our snow days I thought we would just have fun painting to refresh us.  (Granted, snow days are pretty much behind us, but I still thought I'd share.)

M began painting the snowman with near-perfect circles of white paint on the blue construction paper.  I loved it!  It wasn't long until she started painting the entire scene, covering the entire paper with snowy white paint.  

Honestly, I was a bit disappointed.  There was no longer any distinction between the snowman and the rest of the paper-not even the circular brush strokes.  

To help M make a snowman in her snow scene, I tinted some of the white paint with purple.  She made a lavender snowman.  I wanted to make it sparkle, so I added salt to the picture's snowman.  Then M used a permanent marker to add the hat, face, buttons, and arms.  

She certainly had fun with this, and liked the added salt sparkle.  If I were to do it again, I would have her add the details before the salt.  Even Sharpies didn't want to write well on the salt.

(Glitter is just about forbidden in our home, and I don't mind avoiding it all together.)

Realizing that M just needed to explore in her own way was good for me.  Coming up with a solution to enable her to create the snowman that she did actually want to make was good for both of us, too.  She was extra excited to make a purple snowman!  Flexibility...not my strong suit, but good to be.

E painted snow, too.

I shared about the snow scene made with paper reinforcement stickers last week.

This Simple Home (The New Blog)

Follow This Simple Home

Best Blogger Tips

sitemeter 2.16.10