Now blogging at THIS SIMPLE HOME.

Now blogging at THIS SIMPLE HOME.

At This Simple Home

Showing posts with label Holidays. Show all posts

Thursday, November 24, 2011

Happy Thanksgiving!

The Muppets
Add caption
I have much to be grateful for, including the unhappy baby on my lap as I type with one hand.  Our family had a quiet Thanksgiving, including a simple turkey dinner, complete with my first truly successful apple pie.  My husband took the Big Kids to see The Muppets.  It was their first theater experience!  We love the Muppets.  (It is rated PG, but after reading Plugged In's review, I was pretty sure it was appropriate.  Derek says it was.)


In addition to my family and friends and Savior...I am very thankful for this blog (as a writing outlet) and the bloggers I learn from and enjoy.  I especially appreciate those of you who have encouraged me by leaving comments or emailing.  It is wonderful to get to know readers.  I love my blogging friends!!

I hope your Thanksgiving was full of thanks!  Happy Thanksgiving!

Monday, July 4, 2011

Happy Independence Day

Guess where our family went this weekend!
(Up close and personal)
( A different view near our relative's home)

Today we are home.  To make Independence Day a bit of a celebration, yet still low-key, we made lemonade, enjoyed the sprinkler, and intend catch fireflies and enjoy the fireworks from our backyard tonight.

May your day be full of appreciation for our independence and a great country!

Friday, July 1, 2011

Independence and Liberty Preschool Crafts


Last year we made an American flag preschool craft to celebrate Independence Day.  It turned out great, and my daughter still loves to show us American flags!  (Click link to read the details.)

Image from statueofliberty.com
This July we will be focusing more on the Statue of Liberty.  We love to read books about her and learn about the SoL.  This summer we will also be visiting some family in NYC and seeing the Statue of Liberty (though probably from a distance).  I found some fabulous printables for preschoolers.  See the dot to dot, information, and more (especially for older children) and the Statue of Liberty coloring page.  

For books, we recommend The Story of the Statue of Liberty, but our favorite book of our own is The Statue of Liberty (Step into Reading Step 1).  I would like to add L is for Liberty to our collection, too.

Do you have any tips for a short visit to NYC?  Any crafts to reinforce what we'll see and do?  Any book recommendations?

Thursday, February 10, 2011

Sticky Hearts


Sticky Hands, Warm Hearts
Photo Credit: Family Fun

 I saw these beautiful yarn hearts in my Family Fun magazine.  Of course they would be messy, but I thought we could handle it.  I also thought they'd be a delightful gift.  Well, at least I was partially right; they were messy.

We began the project on yet another snow day.  The children LOVED cutting the yarn.  Granted, they liked cutting little pieces instead of foot long pieces.


While they cut, I made the cornstarch glue.  This was my first lump of glue.  The directions weren't clear, but still I didn't think I should get a lump of glue.  I even tried adding lots of extra water.  It didn't do much.  The second wasn't much different.  After that I just thinned our school glue a bit and used that. 
 After E (age 2) went down for his nap (since I am a wise mom), M and I got to work making our blobs hearts of yarn.  Warning: Unless you want glue all over, warn your child that it will be sticky and icky.

Basically, we placed a cookie cutter on a bit of parchment paper.  (Parchment was recommended, but wax may have been the better choice.)  Then we dipped our yarn pieces in the glue and squeezed out the extra.  Then we placed it in the cookie cutter.
 I think my expectations would have been a bit more realistic had I known that a 3 inch cookie cutter wasn't nearly large enough.  I made the heart below, and really, it was the only one that didn't look like a blob of the ones that M and I made.  The blurry photo only makes it look better.
However, if you have a way to make a giant yarn heart, I'd say go for it!  Visit Family Fun's directions.  If you are able to make the cornstarch glue, please tell me how!  If you don't want to try that, I would suggest liquid starch.  (I haven't used it since an art class in college, but I think it would be perfect for this project.  You can buy it at your grocery store, too.)

For us, this was a worthwhile craft since the children loved cutting.  M was really disappointed, and I was, too.  However, it was a good lesson for both of us that crafts don't always turn out.  She was actually okay with me throwing out the blobs of yarn.

We made Raggedy Ann and Andy crafts with the extra yarn we cut.  We are enjoying the books a lot!  I think I will stick with the heart hunt for this celebration today.

Monday, February 7, 2011

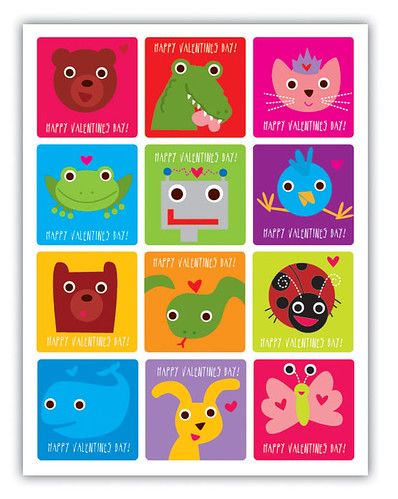
Printable Valentines!

I was absolutely thrilled to see a post at The Long Thread today highlighting 35 FREE Printable Valentines!  I am certainly not capable of any digital fun such as these, but I can certainly press "print!"

Looking through the bunch, I selected a handful that I thought might interest M to share with her preschool class.  These were her top three, though I think she had a bit of a tough time narrowing them down.

I was really quite excited that these three (especially the zebras) made it into her top choices.
free valentines
Zebra Valentine's Day Cards
You can find all of these at the link above, but here they are specifically, left to right.

I found one for my husband, too!
These SUPER Valentines are at Hotcakes.  Her son designed them!!  They were quite the hit with M, but didn't quite make the cut.
No worries on spoiling the surprise for my husband.  He doesn't read this blog, though he does read our family blog faithfully.  

I don't like buying things with licensed characters for the most part and almost every box at the local drugstore is a licensed character.  The other problem with going to the local store is that I would go without M and pick something for her.  She'd be excited for whatever I would choose, but it's so much better to give her the choices and let her pick.  If we were to go together to the store she would like something like Bratz or Spongebob...shows we do not watch.  Okay, I will admit it.  She would likely choose Toy Story or Cars, which would be appropriate, but aren't these printables fun!

 (We do buy books and DVDs though and have plenty of licensed toys...I just try not to purchase them myself.  Am I the only one like this?  Probably.)

M's first choice is actually the pink printables above!  Very feminine and fun!  I think it was the ice cream that convinced her!

What about you?  Will you be making, printing, or buying Valentines?  Don't forget to have that preschooler practice writing or tracing their name!  (In her class last year M was only one of two children who did that!  It's great fun, too, to make the cards personal!)

Tuesday, February 1, 2011

Stitched Valentine's Card

[100_2306.JPG]Two years ago I made this card for my husband for Valentine's Day.  It still hangs on our refrigerator with a  Bible verse inside that remains an excellent way to show love.

Though this is perfectly appropriate for a grown up to make, it is equally appropriate for a child learning to sew.

The idea and template came from Make and Takes.  She has other cute stitched cards, too.  She also inspired me to make my own template for a Housewarming Stitched Card.

Last year I made an Owl Valentine's Day card for my husband.  Do you make your own cards?  I would love to see your ideas!  Please inspire me!

Curious about the verse I chose?  I can be quite selfish, so it's quite good for me.
Do nothing out of selfish ambition or vain conceit.  Rather, in humility value others above yourselves, not looking to your own interests but each of you to the interests of others. ~ Philippians 2:3-4

Monday, January 31, 2011

Valentine Variety for Preschoolers

In the past we've completed a handful of Valentine's Day and heart crafts.  I thought I would highlight some love themed ideas.

The Heart Owl Craft is one of my all time favorite crafts.  My daughter made one...but so did I!  (Mine was more of an Owl Valentine.  Same process, but two different links since they served two purposes and were made at different times.)
 
Made by M, at age 3
Made by me


We also made a Heart Mosaic Craft.
[IMG_0400.JPG]
We also made homemade stencils from plastic lids.
[100_3170-1.JPG]
I will be on the lookout for other grown-up homemade cards.  That owl must have depleted my creative juices!  I do not buy Valentines for my husband but I always make them.  Any ideas?

Every child loves a special treat of their own.  We made pancake shapes and monogrammed pancakes.

Thursday, December 2, 2010

Gingerbread Children

Packaging paper...we often get it in abundance at this time of the year, and I try to reuse it.  Today's project used paper from ONE little box.  Last year I shared a different packaging paper use that my daughter actually remembered when I put the paper on the floor today! 


Yesterday morning I was going through my google reader catching up with some blogging friends when I came across my friend at Superheroes and Princesses post about how they made a gingerbread boy and girl. I was instantly inspired, especially since we have the book memorized and all needed materials were on hand.

We read Richard Scarry's The Gingerbread Boy often-several times a week.  We recently borrowed The Gingerbread Baby by Jan Brett from the library and loved that, too.  M was absolutely thrilled with the idea of making a gingerbread girl, and E, our 2 year old, was eager to do like his sister.

First, I traced their bodies.  Um.  Just so you know, my children do have necks!

I gave E some buttons to color, though he did scribble some.  I actually colored his hair and showed him the facial features that I colored.

M spent most of her time making "rainbow hair."  She really likes rainbows!  She also gave herself some buttons.  I drew some flowers for her to color, too.  Everything else she did completely on her own.  I love the giant smile!

E really wanted to spend his time playing with the markers.  Cap on.  Cap off.  In the box.  Dump the box.  

I cut out the gingerbread after they colored.  (M wanted the extra bit of her head included.  She had turned her head while I was tracing.  Oh well.)
Meet Gingerbread Girl and Gingerbread Boy!

 Created and Inspired by M and E.
 
Thanks, Christy, for another great idea!

I'm linking up this week to ABC and 123 and stART!  Check them out for other awesome kid activities!

Tuesday, November 30, 2010

Handmade Jesse Tree

Finally!  I did it!!  With a few hours to spare, my Jesse Tree is complete!  (Left-click on any image to view it larger, as always.)

This Jesse Tree has two-sided ornaments to tell the lineage of Jesus.


Isaiah 11:1 A shoot will come up from the stump of Jesse; 
   from his roots a Branch will bear fruit.


Please read more about how I made this homemade Jesse Tree with a printable and directions!

Thursday, November 11, 2010

Manger, Baby, and Advent Book

I am getting in the Christmas mode, and thought I'd share how we used the Christmas Advent Book Calendar  last year and will definitely be doing this year too, but with both of our children!

The Story of Christmas: Story Book Set & Advent CalendarThe Story of Christmas advent calendar and book set is fabulous. It opens like you would open the doors to a barn (in the center), and inside are 24 miniature (tiny!) four page books that tell the story of how God rescued us through the birth of Jesus.  Each Bible-based book has a number on it, so you you don't need to guess the order of the books if they are not in the book.  Each mini book has a string, so you can hang it on the tree, if you wish.  Last year we weren't able to do that, so the book would appear along with a piece of "hay" and then we placed it in the book.  I totally recommend this Advent Calendar and know that there are similar ones out there that are also great!

The "hay" was really a small piece of brown yarn that M would place in the manger.  It  prepared the manger for Jesus' arrival on Christmas morning.  The craft stick manger is just made with craft sticks and hot glue.  Baby Jesus was pretty simple to make with just some simple stitches, but you could even use glue and a marker if you don't like a needle and thread.  You can read about the making of felt baby Jesus if you like.

This was our big way of learning about Jesus' birth last year, but this year I'd like to complete the incredible Jesse Tree in time!  One (of the many) things I like about the Jesse Tree is that it can be used for children of all ages.  I anticipate using ours for many, many years.  One of my friends even adjusted some of the Scripture used to match the Jesus Storybook Bible.  I thought that was brilliant.  (Unfortunately, she's not a blogging friend, so I don't have a link.)

I am linking up to stART, ABC and 123's show and tell, and Crafy Soiree, Read. Explore. Learn.  These are all great resources for all of us looking to teach our young children or just be crafty!

Friday, July 2, 2010

American Flag Preschool Craft

Have a wonderful Independence Day!  We have company coming in for the weekend, so we're looking forward to that visit.  In the meantime, we made a traditional (with about half the stars) American flag craft (and attempted a red, white, and blue mat...turned purple) to go with the book Stars and Stripes by Salina Yoon.  We just love this book for our children!  Enjoy making your own flag with your preschooler for the Fourth of July!
Stars and Stripes (Salina Yoon Books)


Gather Your Materials:
Flag
    7 strips of red paper (make sure when positioned on the paper, white stripes from the background will show)
     blue rectangle, cut to size
     foil star stickers (or white paint could be used to make thumb prints as a substitute)
     glue
     white paper, cut 1-2 inches smaller than
Background
     red paint
     blue paint
     paint brush
     white paper
Additional stickers optional


Background Mat:
If you want a colorful background mat, put dots of paint around the outside of your piece of paper.  Try alternating the red and blue.  Four dots of each color covered our paper!  If you have an older child, try to suggest not mixing the colors to make purple, but letting the red and blue stand boldly on the white background.  Set aside to dry.
Flag:
Begin by looking at a flag, or the flags in Stars and Stripes.  Begin at the bottom, and prepare a red strip with glue.  Continue adding stripes until about halfway up the flag.  Then I would suggest going to the top and add stripes from the top going down the flag.

When the stripes have been completed, add up to fifty foil star stickers to the blue rectangle.  (We used less than twenty-five stars.)  Glue blue rectangle in the upper left corner of the flag!

Once the mat has dried, use decorative stickers (or glue) to attach flag on the mat.  Hang in a prominent place and watch your child beam with pride!  Then go for a walk or drive and see how many American flags you can spot!

Thursday, June 17, 2010

Father's Day Hand Prints

If you are a grandpa or the dad to my kids, you should skip this post or spoil your surprise.
This photograph does not show the potential for this "card."  My inspiration came from Izzie, Mac, and Me.  Cindy had made a framed set of prints at Christmas.  It was so adorable, so be sure to check out her set. 

I wanted something more card-like to give to each of the grandfathers and my husband than Cindy's framed prints.  I traced each of the children's hands on to cardstock.  Then I cut those out and traced and cut hand prints from contrasting scrapbook paper.  Each heart holds the child's name.  The oval at the top could be titled with anything, but I decided to put the date and Father's Day there.

It's simple...maybe too simple for some, but you can always make this idea your own!

I'm linking up to Crystal's Craft Spot Challenge.  Click button for more Father's Day ideas!


Sunday, June 13, 2010

Father's Day Tool Box Card


Last year M, then age 2 1/2, made six of these tool boxes for her dad and the grandfathers in her life.

She had such fun making the tool boxes that I wanted to share it this year with the readers who may be thinking about a craft.  I'm still trying to figure out what we'll do this year.  Please share suggestions!

This was inspired by Ramblings of a Crazy Woman.

Friday, April 2, 2010

Polka Dotted and Striped Eggs


Don't forget to enter our giveaway!

We had some fun making these eggs.  M's favorite part was squirting glue all over the paper eggs!  Last year we made button eggs, but this year we added the rickrack to them for stripes.  I think it adds a great touch!

Two cautions: 1) Little girls with long hair need their hair in pony tails, bun, hair net...something...so that you are not attempting to scrape glue out of her hair for so long.  2)  If you have a 1 1/2 year old child...they might be a bit young for this if you have not done many other crafts together.  E put four buttons on an egg, but really he wanted to eat the buttons and play in the glue.  Silly me.

This Simple Home (The New Blog)

Follow This Simple Home

Best Blogger Tips

sitemeter 2.16.10