Now blogging at THIS SIMPLE HOME.

Now blogging at THIS SIMPLE HOME.

At This Simple Home

Showing posts with label Christmas. Show all posts

Tuesday, December 27, 2011

Organizing Christmas Ornaments


If you are looking for a way to organize Christmas ornaments, I have heard that using an egg carton is a great way to do it.  I plan to do that this year with some of ours when we take down our tree.

Do you have something that works well for your family for organizing ornaments?  I'd love to hear about it! Last year we organized the kids' ornaments in separate boxes and it worked great!

Sunday, December 11, 2011

Christmas Resource

Our Worldwide Classroom

If you are looking for Christmas traditions, activities, crafts, or recipes head over to Christmas Fun at Our Worldwide Classroom.  I plan to link up, too!

Wednesday, November 30, 2011

Christmas Craft Ideas

Over the past two years we have made a handful of Christmas crafts together.  I hope to do more this year, too.  

Gingerbread Children
(Yes, the 2010 gingerbread kids are still hanging!)


What Christmas crafts do you think we should do this year??

Tuesday, November 22, 2011

Christmas Gift Ideas

Sometimes it takes talking to friends and reading friends' blogs to come up with good Christmas gift ideas.  I thought I'd share a few ideas of items we are purchasing this year (and a few items that we already love).

Need a gift for a...

LightWedge Original LED Book Light, BlackReading enthusiast~Light Wedge
Last year I didn't get the Light Wedge for Christmas...so I bought it for myself.  (By purchasing a color other than black, I bought it for about $15.)  Later I also purchased the case because it does scratch very easily.  I LOVE this book light!


Little boy who has plenty of trucks and cars and loves diggers~Excavator
We recently ordered this excavator for our three year old son.  We fully anticipate him loving it.  He recently was given a Hot Wheels jump track that he loves, too.

Melissa & Doug Friendship Stamp SetLittle girl who loves to create and wants to do more independently~ Stamp Set
We picked up a Melissa and Doug set filled with butterflies and flowers a while back.  Our five year old loves to make little projects, but my time is limited these days with what I can do with her.  She'll love the little box and having all the little stamps (and finally her own pad) in one place.


Star Wars enthusiast~books
The Jedi PathActually, I bought two books for my husband...one for the content and the other because he can share the pop-up book with the kids until they are old enough to watch the movies.  I picked The Jedi Path based on this review.  Then a friend...a librarian friend told me about the pop-up books!  She had ten copies in her library because the kids loved them so much!  After looking around Amazon a bit and watching the video in the link, I chose Star Wars: A Pop-Up Guide to the Galaxy.  I think he'll really enjoy it.  (One book will be for Christmas and the other for his birthday.)
Sunbeam Electric Heated Blanket Imperial Nights, Assorted Colors/Sizes

Person who is always cold~ electric blanket
  Last year I bought us a king sized electric blanket for $35!  (It was a black Friday deal, from Boscov's and made by Sunbeam.)  It has dual controls which lets my husband who is always warm and me (never warm) be much more comfortable!  I wish we had it YEARS ago!  I love it!

Discover Deep Valley A Guide to Maud Hart Lovelace's MankatoThe Betsy-Tacy Treasury By Maud Hart Lovelace


Maud Hart Lovelace fan~ more books!
The Betsy-Tacy Treasury was just released.  It has the first four books in it...just waiting to be read!  In addition to that, Discover Deep Valley: A Guide to Maud Hart Lovelace's Mankato was just released last month!  It's available through Minnesota Heritage Publishing. 


 If you end up clicking through an Amazon link here at LLL, a tiny percent does come back to me at no additional cost to you if you purchase ANY item.

Thursday, November 17, 2011

Counting Down to Christmas Part 3: Advent Book Calendar

This is our third (and final, I think) part of Counting Down to Christmas!  Be sure to check out our homemade Jesse Tree and how we enjoy Christmas books throughout the month!

The Story Of Christmas Story Book Set and Advent CalendarWe LOVE the tiny little books that comes with The Story of Christmas Book Set &Advent Calendar.  The books tell the story of how the birth of Jesus using scripture.  Each of the twenty-four board books is just four pages long (with small print) and attached is a silver loop, making these books easy to hang!  The Story of Christmas Advent Calender is perfect for families with younger or older children who want a daily reminder of what Christmas is all about.  Each book is numbered, too, so they are easy to keep track of the books.  Some families may choose to hang a book daily on a tree, but we use them in a different way.

I use The Story of Christmas Advent Calendar with a homemade mini-craft stick manger.  I place a piece of brown yarn and the appropriate day's book in a small, decorative box with a lid.  The children check the box throughout the day to see if the "hay" and book are there.  The "hay" is preparing the manger for Jesus.  As you might suspect, Jesus arrives Christmas morning.  You could use a Little People (or even just a drawing) Jesus, but I made a special little felt "doll" to represent Jesus, swaddled in his manger.
Jesus was made with two gray felt ovals and a medium brown oval.  I stitched eyes, nose, and a mouth onto the brown oval and then stitched it to a gray oval.  To make it appear that Jesus was swaddled, I also stitched some simple lines, as you can see (I hope) in the photo above.  I used cotton balls to stuff this little Jesus doll, if I remember correctly.  Below you can see another view of the manger.
My five year old recently brought up the ways that we celebrate Christmas!  They certainly left an impression on her last year and she is eager for the little ways (not just the gifts!) we celebrate throughout the month.

How do you celebrate Christmas during the month of December?


Tuesday, November 15, 2011

Counting Down to Christmas Part 2: A Book a Day

Last year I realized we had a lot of Christmas books.  In order to really appreciate our own books, I decided to really highlight our own books for the month of December.

I gathered up all of our Christmas and winter books and put them inside of a regular box.  Counting them, I was shocked to learn we already had nearly twenty Christmas books!  By the end of the month with a couple of new/used purchases and review books, we had more than 25 Christmas and winter books!  (This year, I think we can focus on just Christmas books since we've added even more to our Christmas collection!)

Each day I would take one book from the big box of books and place it in a decorative box.  It would "magically" appear in our living room every day.  My children took turns each day opening the box.  I would try to have my son, then 2, open simpler books, and my older daughter open books that were lengthier.  The children LOVED this activity and looked forward to it daily!

Sharing a Christmas book a day is simple.  Just gather your books and provide a way for your child to read a book each day.  I used the decorative box with a lid for the children to open, but you could wrap each book, too!  For our family, we also kept all of the already-opened books in one basket, pictured above.  These books were accessible throughout the month for our regular read-aloud times.  Almost every time a Christmas book would be chosen for read alouds instead of one of our "regular" books!  Many of our books had many re-reads!

If you are interested in reading a Christmas book each day in December but have a limited collection of your own, you might run out to your thrift stores now or go to your local library.  It's about this time of year that libraries gather Christmas titles in one place!  Some libraries (or at least mine) actually shelf all the Christmas picture books together all year.  (So much for the Dewey Decimal system!)  However, it is always worth it to have quality Christmas books, too.  Last year I selected our favorite Christmas books and highlighted them.    You can click for yourself to read the selections that we love, but you will notice variety.  Though I love using books to share about my faith with my children, some of my favorite Christmas books are not focused on Jesus.  We use our homemade Jesse Tree and our incredible advent calendar books to keep our eyes on Jesus' birth.

Thank you once again goes to Amy and Carrie for such a great idea!

What is your favorite Christmas book?  Any great chapter books out there?  


Be sure to check out part 1 of our countdown to Christmas!  Our Jesse Tree!

Monday, November 14, 2011

Counting Down to Christmas Part 1: Jesse Tree

This will be our third year celebrating Christmas daily in December.  I know it's still early, but you may need to prepare a bit if you are inspired to do any of these activities to count down to Christmas.  Today I'm sharing just one part of our daily celebrations with you.  More will be shared soon!

The Jesse Tree is something I hadn't heard of until a few years ago.  A Jesse Tree is a way to connect the story of the Israelites in the Old Testament with the coming of the Savior, Jesus Christ.  The name comes from Isaiah 11:1

"A shoot will come  up from the stump of Jesse; 
from his roots a Branch will bear fruit."

Read how I created this portable Jesse Tree!

Wednesday, January 5, 2011

Name Bean Bags

You might remember my thoughts to make several handmade gifts for my family.  Well, it was just a thought...not reality.  I still like the idea of trying to make fabric letters for my kids, but I after cutting out one letter's layers, I thought it was just too much.

Since I still wanted to sew a toy that had letters, I made bean bags for my children.  Each bean bag has a letter of the child's name.

These are rustic.  I know.  But they have great potential for throwing and word building.
You can create words other than their names, too.
VEGAN-for my friend Jenny
Silly Eagle Books first gave me the idea for name bean bags.  But she used fabric paint...and I did not want to buy fabric paint or freezer paper.  I had the thought to just use a fabric marker, but really I tried, and it didn't look good.  So I used applique.  I learned how to do it when I made the name pillows.

I have always had a thing for lettering.  I cut these letters fully free-hand.  (When I was in high school I used to draw the names of my favorite bands on my book covers and notebooks to look like their names on my cassette tapes.  I was pretty good, too, at Poison and Cinderella.  Though my taste in music has changed, and I pay much more attention to lyrics than I did then, I still like to play with letters and words.)

If you are interested in cutting letters from fabric or paper free-hand, I totally recommend it!  To keep the letters all the same height, I first cut a long rectangle of fabric.  Then I cut that rectangle into smaller rectangles, always keeping the height the same.  It is not necessary to have all the rectangles the same width because some letters should naturally be wider than others.  (W takes up much more width than I.)  Then I just cut.  Of course you could draw the letters on the fabric, too, but this worked great for this project.

I appliqued the letters to the top of the fabric squares and then sewed them, leaving a small opening for the beans.   (A funnel is helpful!!)  We learned that Roman beans are much too large, dense, and heavy to be in a bean bag.  It would have been a weapon for my children!  We changed to a smaller black-eyed bean.  They turned out well enough for our family.

If you decide to make name bean bags, I'd love to see your result!  Paint sure would have been simpler, but these work, too.  I didn't have any masculine small-print fabric, so I used the navy stripes.  I really liked the feminine purple with multi for my daughter though.

Tuesday, January 4, 2011

Organizing Christmas Ornaments

With my daughter now four years old, we learned what great joy she had when I handed her an ornament of her own to hang on our Christmas tree.  Last year we made several ornaments like the snowflake button ornament, salt dough handprints, and this year we made the handmade paper ornaments.  We have some that have been purchased, and others that were made at school or church.  I decided it was time to do something different.  I wanted the children to have a special home for their special ornaments.

This year when we put away our ornaments, I designated each child a nice box.  Their own ornaments will go in their own box.  It's really that simple.  Then next December when we are decorating the tree, I can hand each child their own box and they can have a blast decorating!

Monday, December 20, 2010

Favorite Children's Christmas Books

My children have been opening one Christmas book each day during the month of December.  It is definitely a huge hit with them and a tradition we will continue!  They are good about taking turns opening each of the books, too.  Thank you, Amy and Carrie for the awesome idea!!

With Christmas almost here, I wanted to highlight our favorite Christmas titles.  We have a lot of Christmas books that we've collected over the years, and I am thankful for each one.  With that said, there are still some that stand out above the rest!
 
Mortimer's Christmas Mortimer's Christmas Manger by Jane Chapman and Karma Wilson is a sweet story about a mouse named Mortimer that wants to live in the manger a family set out by their Christmas tree.  Mortimer lugs and tugs the "statues" out of the manger to make room for himself.  This continues until he overhears the family telling the story of Jesus' birth.  We love everything about this book.

The Very Snowy ChristmasThe Very Snowy Christmas by Diana Hendry and illustrated by Jane Chapman  is another sweet mouse Christmas story.  (HUH! I just noticed the books have the same illustrator, though in Mortimer, the book does not distinguish author/illustrator and gives equal credit to both.  That's really cool!  Even if you just look at the covers, you will notice a resemblance in these adorable mice. )  This book is a Christmas story, but it is also just a fun, sweet book!  Little Mouse goes out to look for holly for the Christmas tree.  Soft white flakes begin to fall, and Little Mouse hurries home to explain to Big Mouse that the sky is coming undone.  Along the way Little Mouse meets some frightening creatures (like his reflection in the water).  Big Mouse eventually helps Little Mouse understand that there is nothing to be afraid of, and then they warm up by the fire.  (I actually won this book, and others, from the publisher Tiger Tales!  You might want to check out their blog so you can win some day, too!  Thank you, Tiger Tales!)

The Little Drummer Boy Board Book  The Little Drummer Boy was my favorite Christmas song before I even understood what the song was about. We have the wonderful board book illustrated by Ezra Jack Keats that tells the story through the song lyrics.  Wonderful and beautiful!  I just love books that are based on the lyrics of a song because it causes the child (or adult) to slow down and consider each word.  (We also like Jingle Bells!)  Another bonus with this book is that we have the Little People Little Drummer Boy set that plays music and has animal sounds.)
Dewey's Christmas at the Library

 The most requested Christmas book has been Dewey's Christmas at the Library, written by Vicki Myron.  It's the story of Dewey, who is a cat that lives in a library, and the adventures that he has.  It really is a great book, and I don't mind reading it again and again!  You can read my full review here.

My Giant Fold-Out Book ChristmasThose books are all wonderful, but my favorite book to teach (to my 2 and 4 year olds) about the reason we celebrate Christmas is My Giant Fold-Out Book Christmas.   This is written by Tracy Harrast and illustrated by Paula Doherty.  Not only is this a fairly large book to begin with (approximately 9x12), but the pages fold out in big ways to create even larger illustrations for the children to enjoy.  What I appreciate most about this book is its biblical accuracy (despite Gabriel's wings).  It highlights Gabriel's visit to Mary, the journey to Bethlehem (and it explains the census), looking for a room and the birth of Jesus, the angels coming to the shepherds, and the wise men's visit.  Each fold-out page focuses on a different part of the story, but it still comes together to create a well-written and illustrated children's version of the birth of Jesus.  I appreciated that when the wise men visit, it says they found Jesus in the house with his mother (not the stable that is too often shown in picture books).  Jesus is also no longer an infant baby in the drawing depicted with the wise men-another plus. Overall, I just love this book, and it is appealing to children, too!

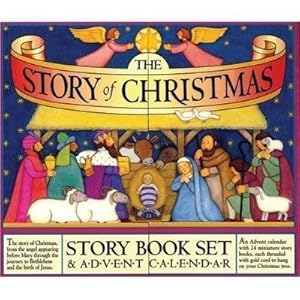
You might notice that these books do not all have Jesus as a theme.  We are using our advent calendar (linked to post about how we are using it) daily, along with our Jesse tree to teach about the birth of Jesus.  I think that our particular advent calendar with the little books teaches the story of Jesus' birth perfectly and biblically.  I am thankful for other books that do the same, but the books I am sharing today are just our favorite Christmas books.  Though our focus is on Jesus during the month of December, we're not opposed to Santa though we certainly understand and respect that others do not teach their children about Santa.

On a side note...I really think it was all the cute mice in books that made me want a mouse as a pet when I was a child.  I will hope that Tumtum and Nutmeg (linked to my review) and others don't have that same effect on my kids!

Monday, December 13, 2010

Homemade Paper Christmas Ornament ~Tree~

I've always liked homemade paper.  It probably comes from my love of stationary.  So I was excited to learn how to make homemade paper ornaments-that even my little guy could make.

I came across this post that first told me about these paper ornaments.  A Faithful Journey let me know that by not reading my Family Fun magazine, I had missed out on this little craft.  I immediately went to my December issue and found this homemade paper ornament craft.
Photo from Family Fun
That very day my children and I went about making our own ornaments before naptime.  Even my two year old son made his own!  We decided to make tree ornaments.  I thought my newly acquired sequins would add a nice touch since we do not use glitter in our home.  Interested in your own?  These directions will make three 3 inch ornaments.

1. Preheat your oven to 200 degrees.  Take 3 pieces of construction paper and tear them into domino-sized pieces.
2.  Place the torn paper in a blender with 1 1/2 cups hot water.  Stir a bit to make sure all the paper is wet.  Let it sit for five minutes. 
 3.  Pulse in the blender for about 30 seconds.  Be sure the lid on the blender is on securely, otherwise the heat will make the lid come off a bit.  Then you will listen to your son say, "Mess!  Mess!" to you.
4.  Place the paper pulp in a strainer and squeeze out the extra water.  Place a rag on top and push down to remove additional water.  
I would suggest dividing the paper pulp into thirds so you know how much pulp to put in each ornament.
5. On top of a plate, put a dish towel.  On the dishtowel place a paper towel and then your 3 inch ornament
 6.  Spoon paper pulp in the ornament and press down.  This is where more detail would have been nice from Family Fun.  I'm not sure how thick these ornaments are supposed to be.  I'm guessing about 5 mm?  
Be sure to get the corners really well.  Then place a rag on top to get the extra water out.  If you are using glitter, sprinkle now.
 7.  Gently press the cookie out of the cookie cutter.  
8.  Bake at 200 degrees for two hours, according to Family Fun.  We used parchment paper on cookie sheets.  If you are me, you will need to bake them for about 4 hours to remove all the moisture, which is important.  I'm not sure if ours were way too thick...but 2 hours was not nearly enough.  (Once again, I would suggest dividing the pulp into thirds.  We did not do that.  I wish we had thought to do that!)
9.  Since the sequins that we put on did not stay on, I used Mod Podge as a glue covering, which worked effectively.  You could wait until now until now to put the sequins on with glue or Mod Podge.  Instead of trying to  
10.  Finish by gluing a thin ribbon or yarn to the back of the ornament.
My 2 year old's tree.
 Interestingly enough, we tried to make a second batch of ornaments.  I thought it would be fun to add flecks of other colors to the tree ornament.  So in addition to the original three green pieces of paper, I added scraps  of other colors.  Well, you know what happens when you mix all the colors, right?  You get brown!

So our plan changed and we made gingerbread men.  Of course, these go well with our gingerbread children craft and our gingerbread house.
How about a little reading to go along with these lovely homemade paper ornaments?  
The Legend of the Christmas Tree or The Gingerbread Friends might be enjoyed by your family like they are by us!

This is linked to ABC and 123, stART, and Kids' Craft!

This Simple Home (The New Blog)

Follow This Simple Home

Best Blogger Tips

sitemeter 2.16.10