Now blogging at THIS SIMPLE HOME.

Now blogging at THIS SIMPLE HOME.

At This Simple Home

Showing posts with label preschool activity. Show all posts

Monday, December 12, 2011

Preschool Christmas Fun

Last week we were all sick which was not fun.  That means we don't have our tree up yet.  Maybe it will happen soon though.

We have been enjoying The Story of Christmas advent book calendar along with our little manger.  The kids absolutely love opening and reading a book a day, though I must confess sometimes the book waits until the following day to be read!  

With illness and just being tired, we haven't been remembering to each day's Scripture to go with the Jesse Tree.  Pathetic, I know!

Despite what we have NOT done, I thought I would share that we had some fun with Christmas printables.
Below is E matching shadows to their pictures for Nativity people and items.
 Below M is hiding behind one of the Nativity counting pages.
We were thankful that Baby E allowed us to do this!  The above activities were free from a Pre-K Nativity Pack. I really liked it because there were some items (like the shadow match) that both children could use (older child cut them).  Other items E, age 3 was able to have fun with, while others were for M, age 5.
Little Angel Interactive Book
Next up is the Little Angel Interactive Book, a freebie printable from Musings of Me.  Michelle offers lots of free printables and some huge units for a small fee...a great resource!

Tuesday, November 15, 2011

Counting Down to Christmas Part 2: A Book a Day

Last year I realized we had a lot of Christmas books.  In order to really appreciate our own books, I decided to really highlight our own books for the month of December.

I gathered up all of our Christmas and winter books and put them inside of a regular box.  Counting them, I was shocked to learn we already had nearly twenty Christmas books!  By the end of the month with a couple of new/used purchases and review books, we had more than 25 Christmas and winter books!  (This year, I think we can focus on just Christmas books since we've added even more to our Christmas collection!)

Each day I would take one book from the big box of books and place it in a decorative box.  It would "magically" appear in our living room every day.  My children took turns each day opening the box.  I would try to have my son, then 2, open simpler books, and my older daughter open books that were lengthier.  The children LOVED this activity and looked forward to it daily!

Sharing a Christmas book a day is simple.  Just gather your books and provide a way for your child to read a book each day.  I used the decorative box with a lid for the children to open, but you could wrap each book, too!  For our family, we also kept all of the already-opened books in one basket, pictured above.  These books were accessible throughout the month for our regular read-aloud times.  Almost every time a Christmas book would be chosen for read alouds instead of one of our "regular" books!  Many of our books had many re-reads!

If you are interested in reading a Christmas book each day in December but have a limited collection of your own, you might run out to your thrift stores now or go to your local library.  It's about this time of year that libraries gather Christmas titles in one place!  Some libraries (or at least mine) actually shelf all the Christmas picture books together all year.  (So much for the Dewey Decimal system!)  However, it is always worth it to have quality Christmas books, too.  Last year I selected our favorite Christmas books and highlighted them.    You can click for yourself to read the selections that we love, but you will notice variety.  Though I love using books to share about my faith with my children, some of my favorite Christmas books are not focused on Jesus.  We use our homemade Jesse Tree and our incredible advent calendar books to keep our eyes on Jesus' birth.

Thank you once again goes to Amy and Carrie for such a great idea!

What is your favorite Christmas book?  Any great chapter books out there?  


Be sure to check out part 1 of our countdown to Christmas!  Our Jesse Tree!

Thursday, November 3, 2011

Homemade Statue of Liberty Costume

Since my daughter was three years old and we read The Statue of Liberty she has loved the Statue of Liberty.  Earlier this year we visited family in NYC, and saw her for ourselves, too.

It was fun and easy to make the Statue of Liberty costume for Halloween this year.  To make one for yourself, you will need just a few items.

2-4 yards of green fabric (2 was perfect for my 5 year old) or bed sheet
cardboard or book
flashlight
crown (purchased or homemade)
colored paper~ 1 yellow or orange, 1 red, 3 green
tape
marker
scissors


Directions:
1. Cover book (or cardboard cut to preferred size) with the two pieces of green paper, front and back.  Tape in place.  Write JULY IV MDCCLXXVI on it.  (It means July 4 1776.)

2. Cover the main cylinder of the flashlight with green paper.  Cut hole for the thumb switch.  Tape in place.

3.  Cut triangles about 3 inches long from the red and yellow paper for flames.  You will need about ten flames.  Curl with scissors, if desired, the way you curl ribbon for gifts.  Tape to the top of the flashlight to complete your torch.

4.  Tie the fabric toga-style to child.  Hold one corner on right shoulder.  Wrap fabric around body, going under left arm, around the back, under right arm, and tied in the back at the shoulder.

5. Place crown on head, tablet in left arm, and the torch in the raised right arm.
You might be interested in our liberty and patriotic activities for young children.

Katie's Nesting Spot

Wednesday, July 20, 2011

Handwriting Practice

Though M is nearly 5 (October!), her handwriting is still difficult to read, even when traced.  She has another year before kindergarten, but it is still important to practice writing on occasion.  Though she does like workbooks, real-life application is best for practicing.

M has a special little notebook.  One day she asked to make a list (similar to lists I've made for her to read at the grocery store) of some suggested words.  I wrote the list in yellow.  She traced the list using a blue marker.  It was fun for her to see the colors mix together to create green.

We also made a list in a similar manner when we were preparing for NYC.  This time, the list contained family members' names and special things about NYC that we already knew about.

Now I'm curious about other lists we can make.  Any suggestions?

Tuesday, July 19, 2011

Kids in the Kitchen: Chocolate Eclair Cake


I made an eclair cake with just vanilla filling years ago...long before children.  Since I wasn't sure what recipe I used then, though it was good, I went looking for another recipe when I had a lot of milk to use.  This one came from my friend as part of a collection of recipes for a bridal shower gift.

Chocolate Eclair Cake (or any eclair cake) is a simple dessert to make and makes a good* choice for Kids in the Kitchen!


Chocolate Eclair Cake
Small box instant vanilla pudding
Small box instant chocolate pudding
4 cups of milk, separated
8 ounces whipped topping (more if you want to add it to the top for serving)
graham crackers (LOTS)
chocolate icing (I used this recipe, but you could buy a can of it.)

Mix vanilla and chocolate puddings, separately, with 2 cups of milk each.  Then mix vanilla pudding with approximately 4 ounces of whipped topping and the chocolate pudding with 4 ounces of whipped topping.

Arrange graham crackers to cover bottom of a 9x13 pan.  Pour chocolate mixture on top.  Arrange graham crackers on top of chocolate pudding to cover.  Cover graham crackers with vanilla pudding and then another layer of graham crackers.  Spread icing on top.  Refrigerate overnight (or at least 3 hours, but more is preferred). Serve cold.

Kid Tasks: (for ages 2 and 4)
Mix puddings.  Layer graham crackers (depending on age, adult may want to do layers on pudding).  Mix whipped topping and pudding.


Mom Tasks: 
I completed all the mixing, making sure each was mixed thoroughly.  I also helped my daughter pour the pudding mixtures and spread them.  The icing was also spread by me.

I knew I didn't want to make a 9x13 pan of the chocolate eclair cake for our family of four.  Instead of just making a half batch with leftover pudding, we filled two 8x8 pans and sent one to work with my husband.  If I had not split it into two pans, the layers of pudding mixture would have been thicker in the photo.

This was delicious!  I suspect the regular eclair cake recipe I made was this one from Kraft.  I suspect we'll add this to our dessert line-up for our family on a regular basis.

*This would have been a much better Kids in the Kitchen activity if I had two whisks.  My son didn't like giving it up to make the chocolate pudding!  He's two years old though.

See our other Kids in the Kitchen post, too.  I'm linking up to Adventures in Mommydom's Kid Friendly Recipes!

Monday, July 11, 2011

New York City Preparations

Our preparations for our recent visit to New York City probably began a couple years ago when I began reading to M about the Statue of Liberty.  Since we have family there, it was time for a visit!

1. First I wrote a few sentences for M to read.  Even if she was not reading, I may have still done this and read it to her.  She loved learning about the trip in this fashion.

Though M pretended to think about where we were going, I think she knew immediately!

2. Using handwriting paper, we made a list of who and what we wanted to see in NYC.  M then traced the letters.  Later I told her about how NYC is called the Big Apple.  She added to word apple to the her list...and spelled it correctly!

The Cricket in Times Square (Chester Cricket and His Friends)3. We began reading Cricket in Times Square before she knew of our visit.  It's a great book for preschoolers because most of the characters are animals, though intended for much older children.  The chapters are short, and include a full page illustration in each.  And of course, it introduces things about NYC!  (FYI, I recently learned this is part of a series!)


4. We read our favorite Statue of Liberty book.

connect_the_dots_game5. I found some great printables about the Statue of Liberty.  The dot-to-dot may have been M's favorite.  Here and here are some that are pretty awesome.

6.  Though not part of our preparations, the day after we returned home as part of our "recovery/rest" we watched The Muppets Take Manhattan.  We really like the Muppets around here!

Friday, July 1, 2011

Independence and Liberty Preschool Crafts


Last year we made an American flag preschool craft to celebrate Independence Day.  It turned out great, and my daughter still loves to show us American flags!  (Click link to read the details.)

Image from statueofliberty.com
This July we will be focusing more on the Statue of Liberty.  We love to read books about her and learn about the SoL.  This summer we will also be visiting some family in NYC and seeing the Statue of Liberty (though probably from a distance).  I found some fabulous printables for preschoolers.  See the dot to dot, information, and more (especially for older children) and the Statue of Liberty coloring page.  

For books, we recommend The Story of the Statue of Liberty, but our favorite book of our own is The Statue of Liberty (Step into Reading Step 1).  I would like to add L is for Liberty to our collection, too.

Do you have any tips for a short visit to NYC?  Any crafts to reinforce what we'll see and do?  Any book recommendations?

Monday, June 27, 2011

Treasure Box

It seems that most young children are naturally collectors.  My daughter is no different.  

When we were reading an issue of a High Five (Highlights, but for younger children...we definitely like it), M was excited to see the craft idea of making a treasure box.
She really enjoyed the process.  M is four years old, and it was definitely a one-on-one project since she needed help alternating the craft sticks.  (Thankfully E was not overly interested.)
I definitely recommend creating a treasure box with your little collector!
We decorated with a simple "M" and a sticker jewel on the top.  A foam sticker cross decorates the interior of the lid.  

M was very proud, and she still loves her homemade treasure box.

Wednesday, June 22, 2011

Beans: Fine Motor and Counters

In December I made personalized bean bags for my children.  When I went grocery shopping, I did not really think through the beans that I purchased.  As it turned out, the Roman beans shown below were much too dense to use.  Since the bag was opened, and we do not eat beans (pathetic, I know), they became a play item for the children.
I have learned that if I just let the kids use their fingers to play with the beans, the beans are likely to become projectiles.  Recently when we played with beans, the children just used teaspoons to transfer them from their storage bowls to regular Corelle bowls.  (I know they enjoyed the sounds of the beans on the glass!)
This is considered fine-motor play, and it really is lots of fun!  

When I taught first grade, I bought kidney beans and turned them into colored counters for math.  I spread the beans outside on newspaper and sprayed just one side of them with spray paint.  The bean counters can be used to help complete addition and subtraction problems or to create sets.  Also, you can take a small handful and create math problems by using the colors of the counters.  (If two in your hand are white and three are blue, the problem is 2+3=5!)

I'm not sure what I was able to accomplish while they played,  but I think I washed all of the dishes.  They played with the beans for a long time, and requested more later.  It will be another fun activity when it is too-hot-for-Mom-outdoors.

Tuesday, May 24, 2011

Book Party!

Now that summer is almost here and my daughter will be home from preschool, we will looking for EASY ways to fill our days.  When it's too much of the same thing, the children bicker and fight.  (Okay, they fight daily, but monotony makes all of us that much crankier.)

One way I love to have some fun with the kids is with a book party.  I gather up lots of books, and even have the children bring some, too.  We put the books into a pile.  Then the children take turns picking books!  A book party also encourages me to read lots of the library books at one time to the children.  (We tend to take so many out at once that I sometimes a book or two get ignored before our next trip to the library.)
Our first book party was in April of 2009.
Sometimes we get lots of pillows and sit on my bed surrounded by books.  Other times, we pile the books on the living room floor and relax on the couch.  Either way, it's enjoyable and just by calling it a party makes it fun.

You could even take it a step farther and have a special treat.  (We don't typically do this, but this summer we will, but not every time.)  Creating bookmarks is a really easy and fun craft.  I just cut some paper or cardstock to size and let the kids "at it" with markers and stickers.

A book party only lasts as long as there is interest.  Sometimes we only get through three books, but other times we read many, many books.  I hope you consider your own book party!

(If your first book party isn't full of books and reading, don't be discouraged.  For our first book party, we read a book or two, and then a diaper desperately needed to be changed.  Once that happened interest was lost, but we have had many successful parties since then.)

Tuesday, May 17, 2011

Plastic Bag Kite (AKA Instant Giggles!!)

Be careful.  Trying this activity will produce Instant Giggles.  Seriously!  

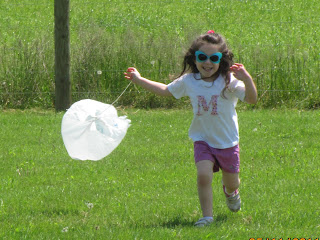
I took two grocery bags and cut a length of string for both bags.  (I gave my older child a bit of a longer string, but both strings were about my arms width or less.)  Tie the handles together with one end of the string.  Give to your two children.  Have them hold the other end.  Run!
Then I showed the children how I to make the bag kite fly by running with it behind me.  Then let the kids run wild!!  My children did not tire of this at all.  
Even after they stopped running, they still took the bag kites down the slide and on the swing.  

A word to the wise: If your children might fight over whose is whose, you might want to use different grocery bags.  Yeah, I learned the hard way.

A second thought:  If you recently planted tiny blueberry bushes (which are literally twigs) and they are not protected by a fence, your child might be so focused on the fun plastic bag kite they may not notice the blueberry twig...and SNAP...when you go to water your blueberry twigs later, you'll find one broken off below the soil.  Yeah.  It's a bit sad.  It's even sadder to know that you already ran over a different bush with the lawnmower's wheel, and there is only one left.  Yep, two out of three bushes-gone!

This is not my original idea, but I have no idea where I saw it whether in a book, magazine, or a friend's blog.  Edited: I suspect it was from Almost Unschoolers, a fabulous and creative blog!  (It may have been a year ago; I'm not sure...)  But this is a must-try activity!  NOW!  Go!  Do it! You will love the giggles!  I think we'll do this once a week all summer.  It won't get old that way.

I'm linking up with ABC and 123...check it out for other great ideas for kids!

Thursday, April 28, 2011

Fun with Pop Beads

Granted, we have only had these pop beads since Easter, but they are a HUGE hit!  
 They were a gift to my four year old daughter from her grandparents.  Can you tell they make a great item for the bulldozer to doze?

In the picture below, you can see there are lots of different sizes, shapes, and even textures to go along with all the rings, bracelets, and necklaces that a child may create.
 My daughter LOVES to create!  Thankfully, she understands that the pop beads are intended for taking apart so that we can create new things all over again.

(Yes, my daughter likes to create a looong bracelet!)
If you are interested in these particular pop beads, they are B. Pop-Arty Beads.  I can see these being the only item played with when little (girl) friends come to play!  If we don't lose pieces to the bulldozer and a certain 2 year old throwing them, they will provide lots of entertainment for years to come.   These are certainly not the pop beads I had as a child!
Thanks, Grandma!

Tuesday, March 22, 2011

Rainbow Dessert


As yesterday was the first day of spring, and my husband was away on business, I decided to give my kids something to enjoy since they have been miserably sick for a full week.

(M's chest infection has much improved.  E however has a horrific cold-but just a cold at this point.  I don't mean to be pessimistic, but in all likelihood it will become an ear infection since he currently has fluid in his ear.)

Offering Hospitality had a Spring Party Hospitality Challenge.  The best I could do for our "party" was make rainbow pudding!  I had wanted to use vanilla yogurt to keep it healthier and keep the colors true, but as it turns out, this was tons of fun, and we were able to eat it for dessert.  I also do not care for vanilla yogurt-not even if it's pretty.

First, I made instant vanilla pudding during nap time.  Once M (but not E) was awake, we turned that pudding (divided into several bowls-but left out indigo) into a rainbow by adding food coloring and mixing well.  I added the color and M mixed.  We did not add food coloring for yellow.


M told me what color to make each time by looking at a recent rainbow project.  Though she loves to mix marker colors to create new colors, she needed some help remembering how to mix colors.
After all the colors were looking so pretty, we created rainbows in clear plastic cups.  I let M decided if she wanted to begin with red or purple, and she started with purple.

I wish I had started with more pudding in each individual bowl.  We were a little shy on making the pudding stretch to the sides, but for a certain four year old, it did not matter one bit!  (And I didn't mind giving the 2 year old a little less.)

I filled E's cup and my own.  M then used the remaining pudding to fill her cup.  She loved this process so much.  If she does indeed have a rainbow birthday party in October, we may revisit this as rainbow yogurt (along with these rainbow party ideas), even if the party is just for our family.

As I expected, M was not able to finish her pudding in one sitting.  E was too sick to want to even try it.  Yep, that is sick!
In case you haven't experienced this, explaining that spring has arrived to a 4 year old isn't as easy as it seems since it could still snow!

If you are interested, we have a simple rainbow craft you can check out.  You can also return tomorrow to see our newest name rainbow craft!

Wednesday, March 9, 2011

Toddler Number Game

When I noticed that the Benefiber (possibly from my first pregnancy in 2006) was long expired, I decided it would be a fun game container.

I marked ten craft sticks with numbers 1-10.  On the same side as the digit, I wrote the number word.  Then I placed the corresponding number of dots on that same stick's back side.  (The written word number was more for my 4 year old.)
Then I gave it to my son to use.  He loved it, as did my daughter.

About a month before this I had used a yogurt tub for the same game.  I had cut a small hole in the lid, and placed Scotch tape around that hole's opening to prevent cuts to little fingers.  My son actually could do that game independently since he needed help with the Benefiber's flip-top lid.  Either way, it's an enjoyable game for a 2 year old!

Granted my son totally ignores the numbers and the dots, but he does enjoy the repetition of putting the sticks in the container and taking them out.

Tuesday, February 15, 2011

Teach Basic Shapes and Colors

Children learn shapes and colors from their toys, books, and even their clothes.  I still like to be purposeful in teaching the basic shapes and colors.
To make this game you just need a basic envelope and paper (cardstock is best) in the primary colors. 
I cut a small circle, triangle, and square from each of the red, yellow, and blue papers.  (About 1 1/2 inches each.)
I traced each of the shapes using a pencil onto the envelope.  Then I went over the pencil marks with a black permanent marker.  (If you are going to laminate-or use packaging tape- the shapes, now is the time to do it.  I made the same exact game for my daughter years ago, and it lasted for the time that we needed it-without laminating.)
Then have your children match the shapes.
Later you can request a certain color and shape.

By having your child group by shapes or colors you are also introducing sets, a mathematical concept that will be used for many years to come.  (Even if you never learned the word as a child, you'll have to trust me that it won't be the first foreign concept to you in math with your school-aged child.)

I'm linking up to ABC and 123's Show and Tell.  

Wednesday, February 9, 2011

Valentine Heart Hunt

I like to feel loved and show love, but really, it's a commercialized "holiday."  I still want to show my family love without spending a lot of money.  We played this little game to make a long day a bit more special.  (We have done it before with Easter eggs and Christmas ornaments.  For those of you who celebrate St. Patrick's Day at home, shamrocks would be fun, too.)

We have played this hide and seek game before, but this was the first time I tried to involve E.  He was not interested though.

I cut out pink and blue hearts and "hid" them around the first floor of the house.  At least part of the heart was always visible, and usually most of it was showing.  M was supposed to find the pink hearts and E the blue hearts.
She giggled at the obviousness of this heart.
 I am noticing it's time to clean the fridge door!


 M got the idea to gather hearts in the dump truck.  E still couldn't be convinced to join us though.

Eight of the hearts were of good size-approximately 4 inches.  Each child  M also had 2 smaller hearts to find.  It was also fun for M to hide the hearts for me to find.  (I was hoping the children would do this together.  Maybe in a couple months.)      

This is a fun, no mess activity to show a bit of love.  I intend to take it a step further for M (age 4).  It will also keep the game fresh.  I will be writing numbers 1-20 on the hearts.  Then she'll put them all in order after she finds them.

To focus on real love, I think I will put Bible verses on a few of them to show God's love.  I will only put the reference, that way we have to go to the "grown-up" Bible to see what God says about love.  I am thinking John 3:16 and some LOVE IS verses from 1 Corinthians 13.  What other verses would you suggest?

I'm linking this up with ABC and 123's Show and Tell

Thursday, January 6, 2011

Playing School

Since M began school after her third birthday, she has enjoyed playing school, especially when she finds something suitable to be a pointer.  For over a year she has just pointed to blank wall space.  Not anymore!

On my rare (very rare) visit to Target this fall, I saw they had child-sized pointers in the dollar area.  I promptly picked one up for M and set it aside.

It was almost forgotten, until I awoke about 4:30 Christmas morning.  I did a google search of hundreds charts and alphabet charts and came up with some suitable charts.  (I wish I had a different font for the ABC's, but at that early hour in the morning I was not going to search out anything too special.  They are customizable fonts, too.)  I printed them out on some colorful paper and laminated them.   Before returning to bed, I placed them in her stocking.

I knew I'd wanted to do this for M for a really long time.  I thought I would get to the local-ish teacher store for a couple of charts, but am so glad I did not.  These 8 1/2x11 sized charts are perfect for play.  We are not homeschoolers, so we just use them for (purposeful) play.

Wednesday, January 5, 2011

Name Bean Bags

You might remember my thoughts to make several handmade gifts for my family.  Well, it was just a thought...not reality.  I still like the idea of trying to make fabric letters for my kids, but I after cutting out one letter's layers, I thought it was just too much.

Since I still wanted to sew a toy that had letters, I made bean bags for my children.  Each bean bag has a letter of the child's name.

These are rustic.  I know.  But they have great potential for throwing and word building.
You can create words other than their names, too.
VEGAN-for my friend Jenny
Silly Eagle Books first gave me the idea for name bean bags.  But she used fabric paint...and I did not want to buy fabric paint or freezer paper.  I had the thought to just use a fabric marker, but really I tried, and it didn't look good.  So I used applique.  I learned how to do it when I made the name pillows.

I have always had a thing for lettering.  I cut these letters fully free-hand.  (When I was in high school I used to draw the names of my favorite bands on my book covers and notebooks to look like their names on my cassette tapes.  I was pretty good, too, at Poison and Cinderella.  Though my taste in music has changed, and I pay much more attention to lyrics than I did then, I still like to play with letters and words.)

If you are interested in cutting letters from fabric or paper free-hand, I totally recommend it!  To keep the letters all the same height, I first cut a long rectangle of fabric.  Then I cut that rectangle into smaller rectangles, always keeping the height the same.  It is not necessary to have all the rectangles the same width because some letters should naturally be wider than others.  (W takes up much more width than I.)  Then I just cut.  Of course you could draw the letters on the fabric, too, but this worked great for this project.

I appliqued the letters to the top of the fabric squares and then sewed them, leaving a small opening for the beans.   (A funnel is helpful!!)  We learned that Roman beans are much too large, dense, and heavy to be in a bean bag.  It would have been a weapon for my children!  We changed to a smaller black-eyed bean.  They turned out well enough for our family.

If you decide to make name bean bags, I'd love to see your result!  Paint sure would have been simpler, but these work, too.  I didn't have any masculine small-print fabric, so I used the navy stripes.  I really liked the feminine purple with multi for my daughter though.

Monday, November 8, 2010

Play-Doh Placemat

The mornings when M does not have school sometimes drag a bit when I refuse to turn on the television.  I have found that Play-Doh is now a great way for us to pass a lot of time-together-and not just when E is napping.  We loved this with M, now 4 since she was just 2 years old.  I'm thankful that E, age 2, is now able to join us for the fun for long periods of time.

We have the Play-Doh duffle bag, and really, I think it is perfect for a preschooler-and the right price!  This last time we added plastic knives to the bag.  M immediately made chocolate chip cookies, as pictured below.

E was all about the cookie cutters this time.  

M is now old enough that she wants to use multiple colors.  We do this very carefully, and she came up with the idea on her own to use more than one color.  Below you can see her spaghetti and meatballs.  
My children also enjoy their Play-Doh placemats that I made for them.  You could just use card stock or computer paper and type their names, alphabet, and numbers.  You can even cut shapes out like I did for E or the child's name like I did for M.  Then just laminate it!  I do love my little laminator, but if you don't have one, you could use contact paper or take your placemats to your local teacher store to laminate.  I made these years ago, but if I were to do it again, I would let the children decorate the placemats themselves.

The Play-Doh placemat reminds the children where the dough is supposed to be, and of course, is easy to clean up.  We must sweep after every play time, so maybe I need a floor mat, too.  Hmm.

I'm linking this up to ABC and 123's show and tell!  Check it out!

Friday, October 15, 2010

Phonics Flip Book

Ages ago I saw a phonics flip book over at Activity Mom.  I made one for M thinking it was appropriate since she knew all of her sounds.  (I say she knows all of her sounds, but really she knows typical consonant and short vowel sounds.  At this point I don't think she needs more than that.)

Well, M was totally disinterested.  I put it away for several months.  And now both she and E are a bit interested in it.  Maybe I should share that this is minimal interest.  She'll read a few words and E likes to flip pages and say letters.


I cut a spiral bound 3x5 booklet into thirds.  Consonants are placed on the first and third sections, and I wrote vowels in the center section.  (I repeated the vowels several times.)

It's fun to read familiar words, but it can be more fun to say the silly words.

I think a phonics flip book is fabulous for a beginning reader.

This Simple Home (The New Blog)

Follow This Simple Home

Best Blogger Tips

sitemeter 2.16.10